Introduction
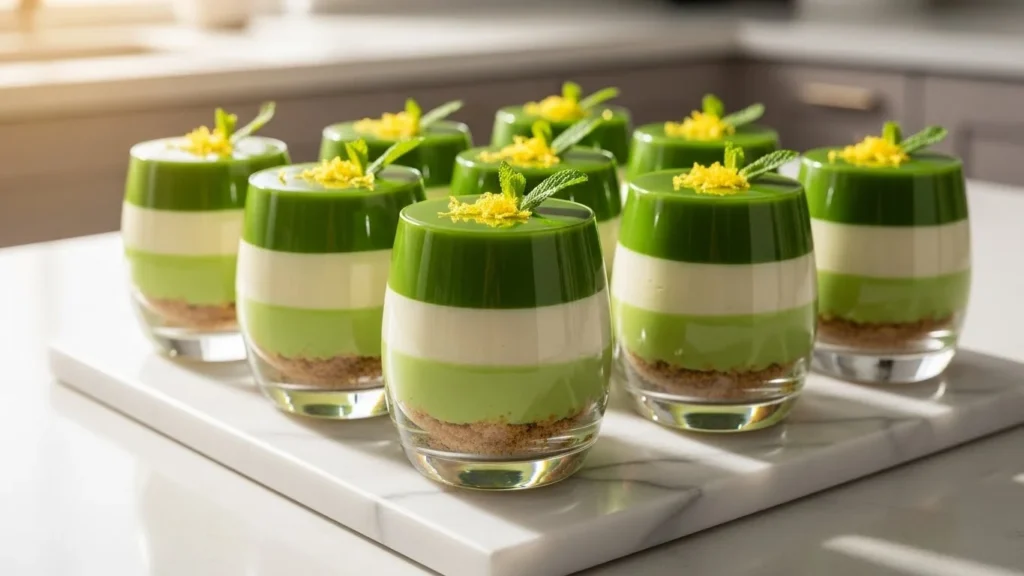
Green dessert cups are the easiest way to get that “bakery case” look with simple layers and smart textures. You can prep most of these ahead, chill them until serving, and still get clean lines and pretty toppings for photos. From pistachio to matcha to lime, each cup brings fresh color and a crowd-friendly finish—perfect for parties, holidays, and Pinterest-worthy spreads.
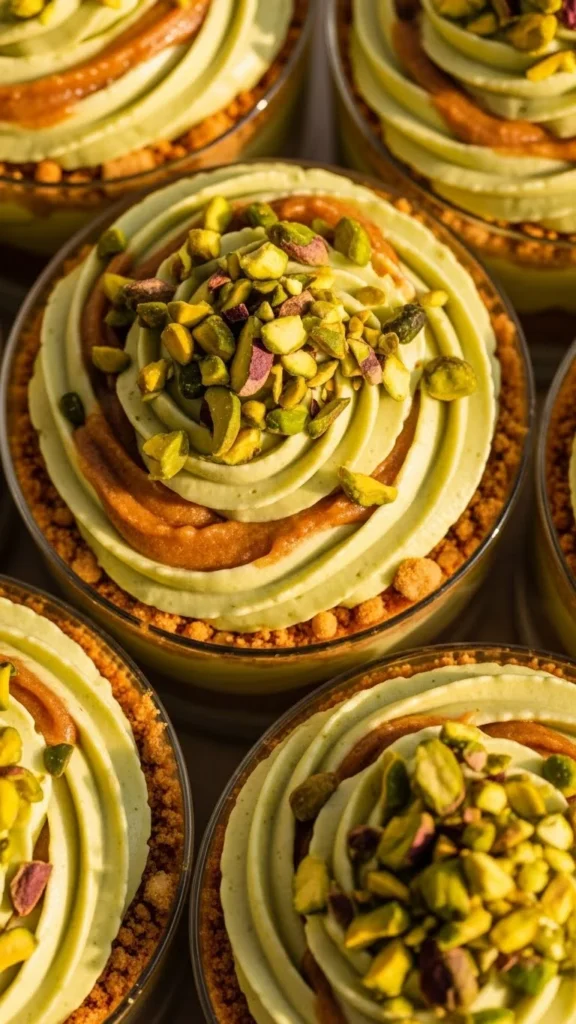
1. Pistachio Cheesecake Dessert Cups
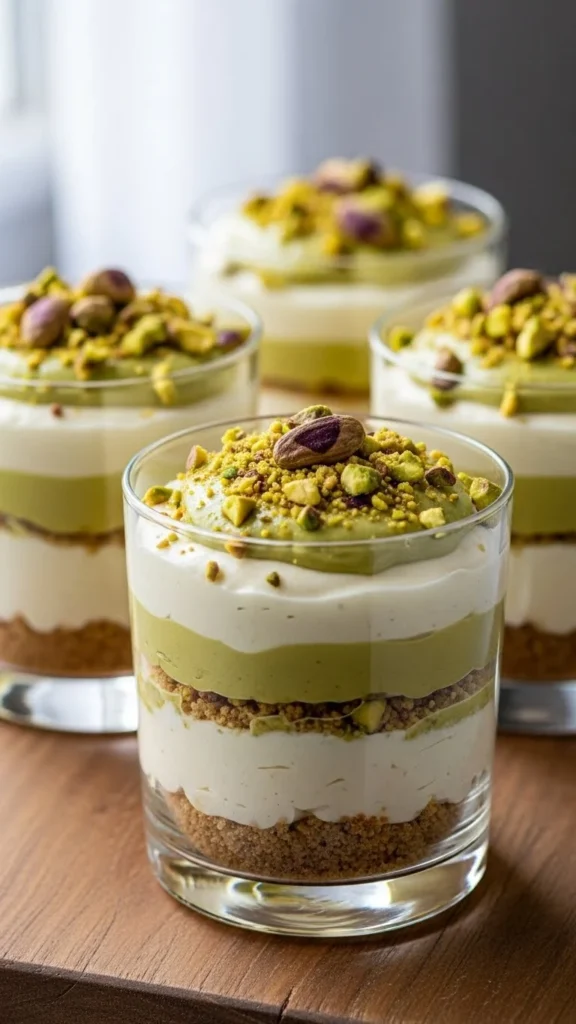
These cups look polished because the layers set cleanly and the pistachio color reads soft and natural. The filling tastes creamy and rich without feeling heavy. A simple crumb base gives structure, while chopped nuts add sparkle and crunch. They travel well and slice-free serving keeps things tidy. Chill time does most of the work, so the final result feels “pro” with minimal effort.
Ingredients
- Graham cracker crumbs: 1 1/2 cups (150 g)
- Unsalted butter, melted: 6 tbsp (85 g)
- Cream cheese, softened: 16 oz (450 g)
- Powdered sugar: 3/4 cup (90 g)
- Heavy cream, cold: 1 cup (240 ml)
- Pistachio paste: 1/3 cup (80 g)
- Vanilla extract: 1 tsp
- Fine salt: 1/8 tsp
- Chopped pistachios (topping): 1/4 cup (30 g)
Instructions
- Mix crumbs + melted butter. Spoon 2–3 tbsp into each cup and press firmly. Chill 10 minutes.
- Beat cream cheese, powdered sugar, pistachio paste, vanilla, and salt for 2–3 minutes until smooth.
- Whip heavy cream to medium peaks (2–4 minutes). Fold into pistachio mixture.
- Pipe or spoon filling into cups. Tap gently to level.
- Chill 2–4 hours (best overnight). No baking required.
How to Serve It
- Top with chopped pistachios right before serving for the crispest crunch.
- Add a tiny dollop of whipped cream for height and a clean finish.
- A pinch of flaky salt makes the nutty flavor pop.
- Serve extra-cold for sharp layers that hold their shape.
- Pair with espresso or strong tea for a dessert-bar vibe.
- Wipe the rim of each cup for that caterer-style presentation.
2. Matcha Tiramisu Cups
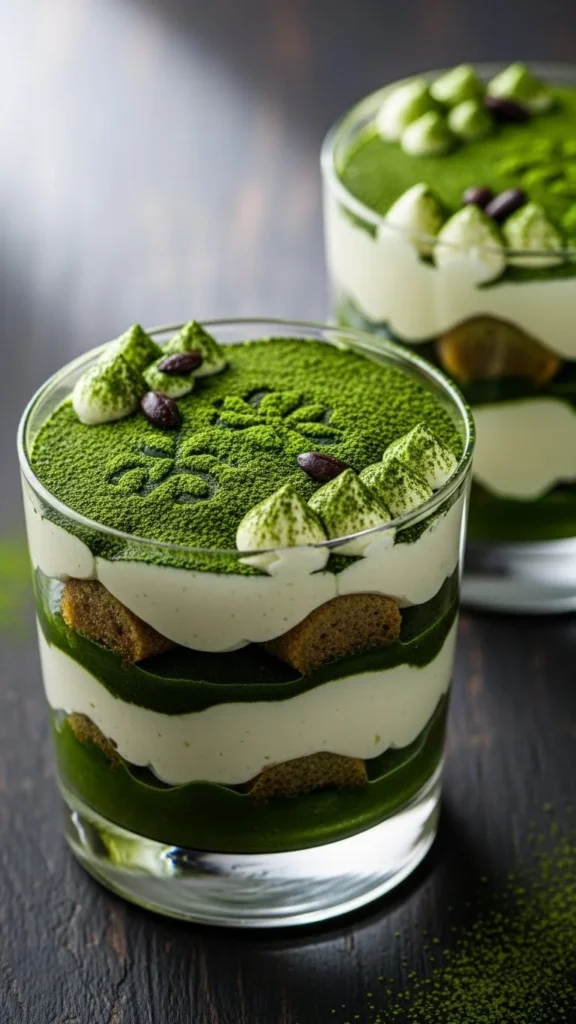
Matcha tiramisu cups look fancy because the top dusting gives instant bakery detail. The layers stay neat thanks to chilled mascarpone cream. The flavor is balanced—earthy matcha with vanilla sweetness. Single-serve cups also prevent messy slicing. They’re great for make-ahead hosting because they taste even better after resting.
Ingredients
- Mascarpone: 8 oz (225 g)
- Cream cheese: 4 oz (115 g)
- Powdered sugar: 1/2 cup (60 g)
- Heavy cream, cold: 1 cup (240 ml)
- Vanilla extract: 1 tsp
- Matcha powder: 2 tbsp (plus more for dusting)
- Hot water: 2 tbsp
- Strong brewed green tea, cooled: 3/4 cup (180 ml)
- Honey or sugar: 1–2 tbsp (optional)
- Ladyfingers: 18–22 (depending on cup size)
Instructions
- Whisk matcha with hot water until smooth. Cool.
- Beat mascarpone, cream cheese, powdered sugar, vanilla, and matcha mixture until creamy (1–2 minutes).
- Whip heavy cream to soft-medium peaks, then fold into the matcha cream.
- Sweeten cooled tea if you like. Quickly dip ladyfingers (1 second per side).
- Layer dipped ladyfingers and cream in cups (2–3 layers).
- Chill at least 4 hours (overnight is best). No oven.
How to Serve It
- Dust matcha through a fine sieve right before serving for a clean top.
- Add a few white chocolate curls for contrast.
- Chill the cups well so the layers hold when spooned.
- Serve with tiny forks/spoons for a “dessert flight” feel.
- Garnish with a mint tip or a thin kiwi slice on the rim.
- Keep extra matcha on the side for guests who love a bolder taste.
3. Key Lime Pie Cups
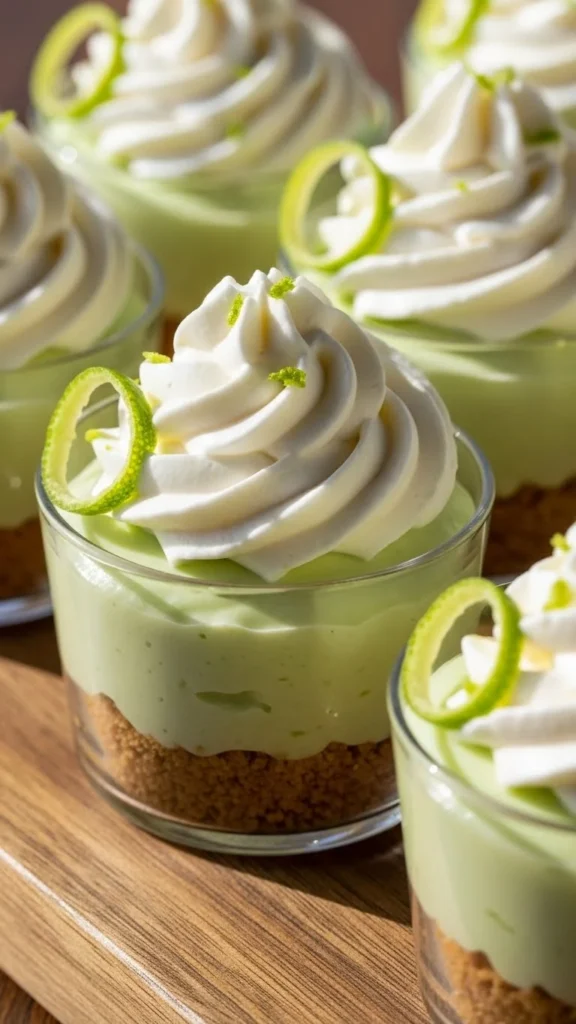
These cups look professional because the filling sets glossy and smooth, like a chilled custard. The crumb base adds a clean line and keeps every bite balanced. Lime zest on top makes them photogenic fast. They’re refreshing after heavier meals and feel festive for spring gatherings. You’ll get classic pie flavor without rolling dough.
Ingredients
- Graham cracker crumbs: 1 1/2 cups (150 g)
- Unsalted butter, melted: 6 tbsp (85 g)
- Granulated sugar: 2 tbsp (25 g)
- Sweetened condensed milk: 14 oz (396 g)
- Sour cream: 1/2 cup (120 g)
- Lime juice (fresh): 1/2 cup (120 ml)
- Lime zest: 1 tbsp
- Whipped cream (topping): 1 cup (prepared or homemade)
Instructions
- Mix crumbs, butter, and sugar. Press into cups. Chill 10 minutes.
- Whisk condensed milk, sour cream, lime juice, and zest until thick.
- Spoon or pipe filling over crust.
- Chill 3–4 hours until firm. Optional: freeze 20 minutes for extra-sharp layers.
- No baking.
How to Serve It
- Pipe whipped cream in a tall swirl for a bakery look.
- Finish with lime zest and a thin lime wheel.
- Serve ice-cold for the brightest flavor.
- Add crushed freeze-dried strawberries for color contrast.
- For parties, set cups on a tray of ice to keep them firm.
- Offer extra zest at the table for a fresh citrus burst.
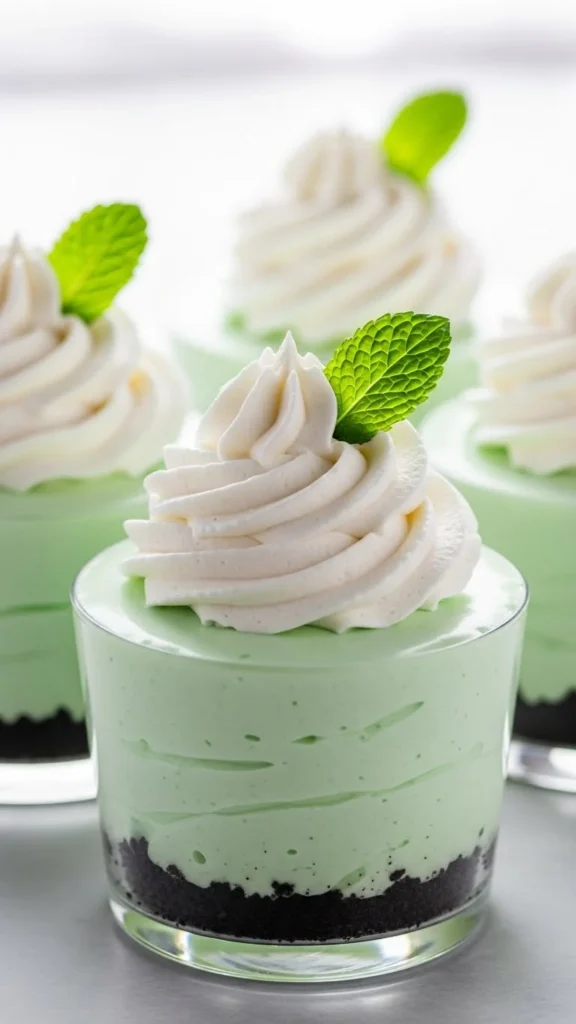
4. Mint Chocolate Mousse Cups
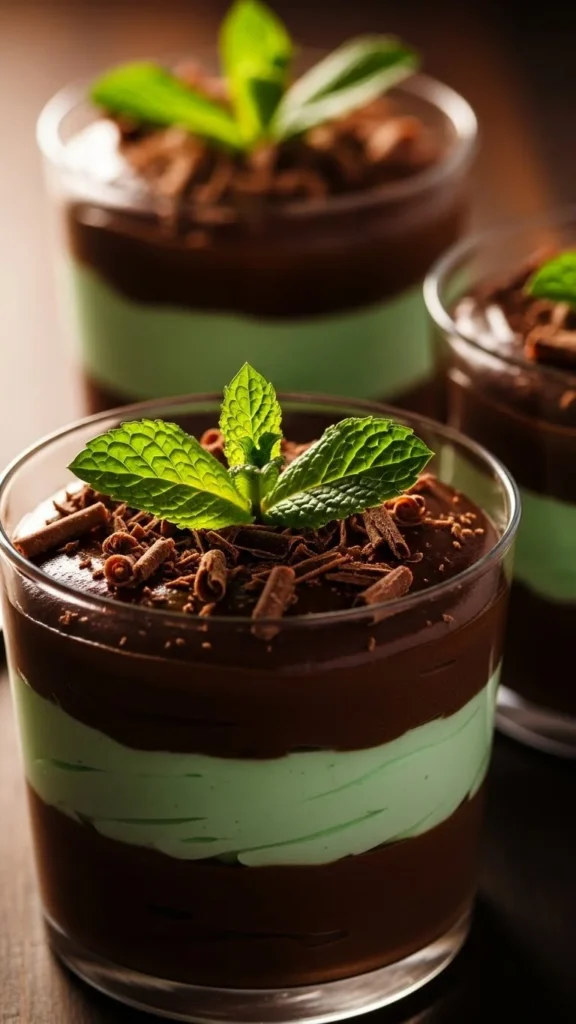
Mint and chocolate always read “special occasion,” and the two-tone layers make it look like a pastry shop dessert. The mousse texture is airy but still rich. A simple chill firms the cups so the spoon glides through clean layers. Chocolate curls add a dramatic finish without extra work. Great for a dessert table that feels a bit dressed up.
Ingredients
- Semi-sweet chocolate chips: 1 1/2 cups (255 g)
- Heavy cream, divided: 2 cups (480 ml)
- Powdered sugar: 1/4 cup (30 g)
- Peppermint extract: 1/4 tsp
- Vanilla extract: 1/2 tsp
- Green food coloring: 1–2 drops (optional)
- Fine salt: 1/8 tsp
- Chocolate shavings (topping): 1/3 cup
Instructions
- Heat 1 cup cream until steaming (not boiling). Pour over chocolate; rest 2 minutes, then stir smooth. Cool 10 minutes.
- Whip remaining 1 cup cream with powdered sugar, salt, vanilla to soft peaks.
- Fold half the whipped cream into cooled chocolate for chocolate mousse.
- Fold peppermint (and optional coloring) into the other half for mint cream.
- Layer into cups. Chill 2–3 hours.
How to Serve It
- Top with chocolate curls or shaved chocolate for instant polish.
- Add a tiny mint leaf and a pinch of cocoa powder.
- Serve well chilled for clean scoops.
- For extra crunch, sprinkle cookie crumbs on top.
- Use a piping bag for tidy layers and smooth edges.
- Pair with coffee for a classic finish.
5. Avocado Lime Cream Cups
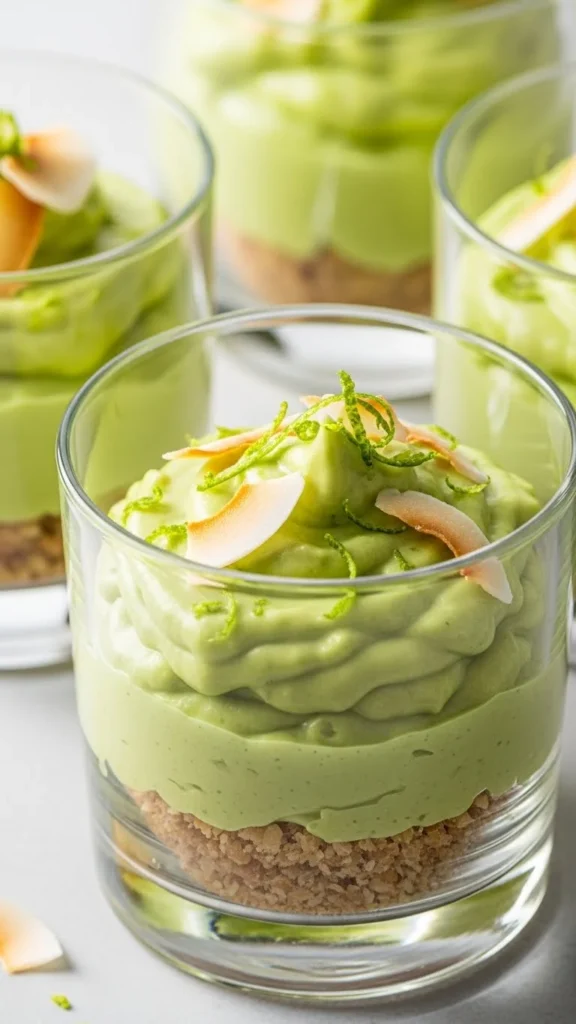
These cups surprise people—in a good way—because the color is natural and the texture is silky. Avocado makes the cream thick and glossy, so it looks like a chef-made dessert. Lime keeps it bright and fresh. A coconut base adds crunch and tropical aroma. It’s also a smart no-bake option when you want something different.
Ingredients
- Shredded coconut: 1 1/2 cups (120 g)
- Graham cracker crumbs: 1/2 cup (50 g)
- Unsalted butter, melted: 5 tbsp (70 g)
- Ripe avocados: 2 large (about 400 g flesh)
- Sweetened condensed milk: 10 oz (283 g)
- Lime juice: 1/3 cup (80 ml)
- Lime zest: 2 tsp
- Vanilla extract: 1 tsp
- Toasted coconut (topping): 1/4 cup
Instructions
- Mix coconut, crumbs, and butter. Press into cups. Chill 10 minutes.
- Blend avocado, condensed milk, lime juice, zest, and vanilla until very smooth (1–2 minutes).
- Spoon into cups and smooth the top.
- Chill 2–4 hours until set. No oven.
How to Serve It
- Sprinkle toasted coconut for texture and a golden finish.
- Add extra lime zest right before serving for a fresh look.
- Serve cold; the cream thickens nicely as it chills.
- A few crushed pistachios look beautiful on top.
- Wipe the glass for clean presentation in photos.
- Offer lime wedges on the side for guests who like extra tang.
6. Pistachio Pudding Parfait Cups
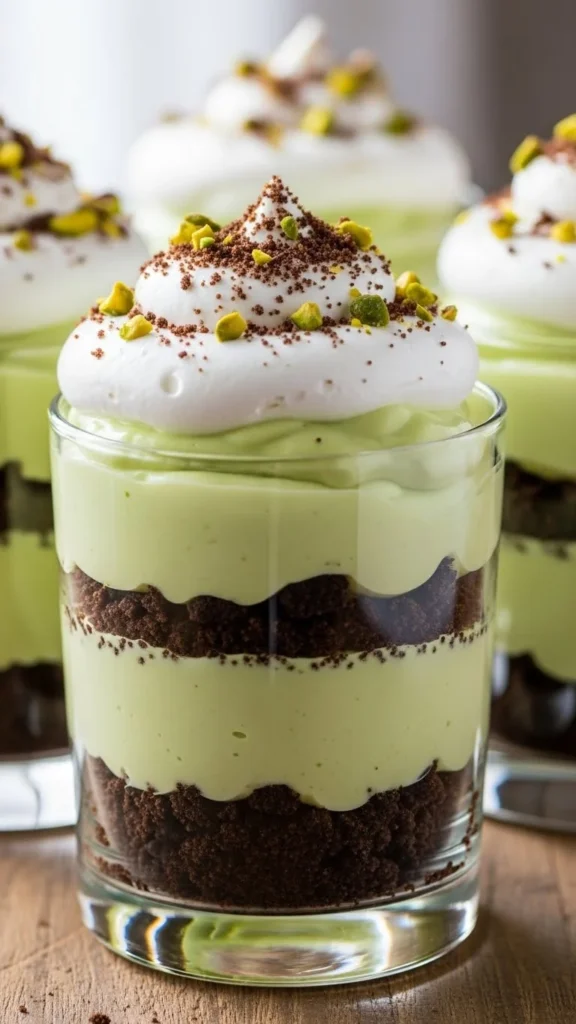
Pistachio pudding parfaits are a fast way to get that pastel green color with a smooth, glossy layer. Crumb layers create clean lines and a satisfying crunch. The whipped topping adds height and makes them look finished. These are perfect when you want a big batch without complicated steps. Chill time makes everything set and slice-free.
Ingredients
- Instant pistachio pudding mix: 2 (3.4 oz / 96 g) boxes
- Cold milk: 3 cups (720 ml)
- Heavy cream, cold: 1 cup (240 ml)
- Powdered sugar: 2 tbsp (15 g)
- Vanilla extract: 1 tsp
- Vanilla wafer crumbs: 1 1/2 cups (150 g)
Instructions
- Whisk pudding mix with cold milk for 2 minutes. Let stand 5 minutes.
- Whip heavy cream with powdered sugar and vanilla to soft peaks.
- Fold half whipped cream into pudding for a lighter texture.
- Layer crumbs and pudding in cups.
- Chill 1–2 hours.
How to Serve It
- Pipe the remaining whipped cream on top for a clean swirl.
- Sprinkle crushed wafers or chopped pistachios for crunch.
- Add one raspberry or strawberry slice for color contrast.
- Keep chilled until serving so layers stay sharp.
- Use clear cups to show off the layers in photos.
- Serve with small spoons so guests don’t over-scoop.
7. Matcha White Chocolate Cups
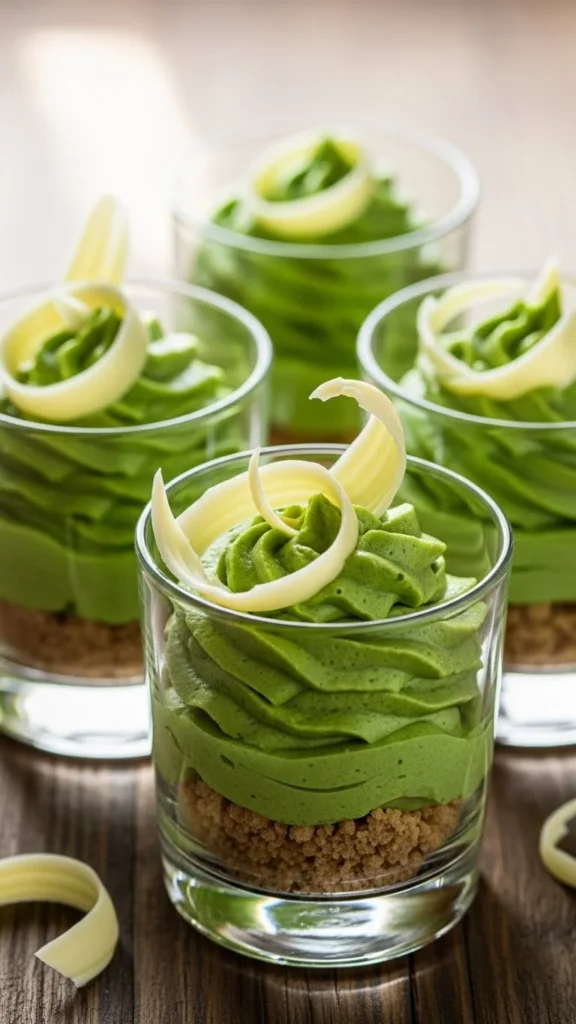
Matcha and white chocolate look high-end because the pale green pairs beautifully with creamy white toppings. The flavor is smooth and lightly earthy with a sweet finish. A crumb base gives a clean foundation so the cup stands tall. The top decorations make it feel like a café dessert. This is a great option for spring brunch tables.
Ingredients
- Shortbread crumbs: 1 1/4 cups (150 g)
- Unsalted butter, melted: 5 tbsp (70 g)
- Cream cheese, softened: 8 oz (225 g)
- Powdered sugar: 1/2 cup (60 g)
- Heavy cream, cold: 1 cup (240 ml)
- Matcha powder: 1 1/2 tbsp
- Hot water: 1 1/2 tbsp
- White chocolate, shaved: 1/3 cup
Instructions
- Mix shortbread crumbs with butter. Press into cups; chill 10 minutes.
- Whisk matcha with hot water until smooth; cool.
- Beat cream cheese and powdered sugar until smooth. Add matcha mixture.
- Whip heavy cream to medium peaks; fold into matcha mixture.
- Spoon into cups and chill 2–3 hours.
How to Serve It
- Top with white chocolate curls for a bakery-style finish.
- Add a light matcha dusting right before serving.
- Serve very cold for tidy scoops.
- A thin strawberry slice makes the green pop on camera.
- Keep toppings dry until the last minute for best texture.
- Arrange on a dark tray to make the color stand out.
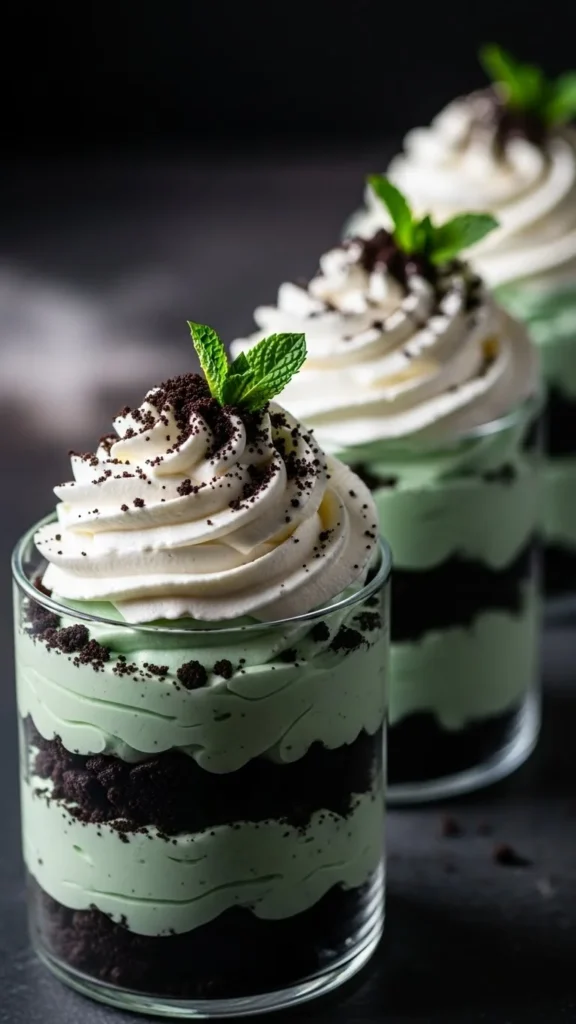
8. Shamrock Mint Cheesecake Cups
These cups bring a festive green color with a classic mint-and-cookie pairing. The cheesecake layer sets firm, so the surface stays smooth and photo-ready. Chocolate cookie crumbs create contrast that looks intentional and professional. They’re easy to portion for parties and taste great chilled. The mint aroma also makes them feel fresh rather than heavy.
Ingredients
- Chocolate sandwich cookie crumbs: 1 1/2 cups (165 g)
- Unsalted butter, melted: 5 tbsp (70 g)
- Cream cheese, softened: 16 oz (450 g)
- Powdered sugar: 3/4 cup (90 g)
- Heavy cream, cold: 3/4 cup (180 ml)
- Peppermint extract: 1/4 tsp
- Vanilla extract: 1 tsp
- Green food coloring: 1–2 drops (optional)
Instructions
- Mix cookie crumbs + butter. Press into cups; chill 10 minutes.
- Beat cream cheese and powdered sugar until smooth (2 minutes).
- Add extracts and optional coloring.
- Whip heavy cream to soft peaks; fold into cheesecake mixture.
- Pipe into cups; chill 3–4 hours.
How to Serve It
- Top with whipped cream and extra cookie crumbs.
- Add a mint leaf for a clean, fresh look.
- Serve straight from the fridge for firm texture.
- For shine, drizzle a thin line of chocolate sauce.
- Use clear cups to show the dark base and green filling.
- Keep peppermint light so the flavor stays balanced.
9. Lime Curd & Yogurt Cups
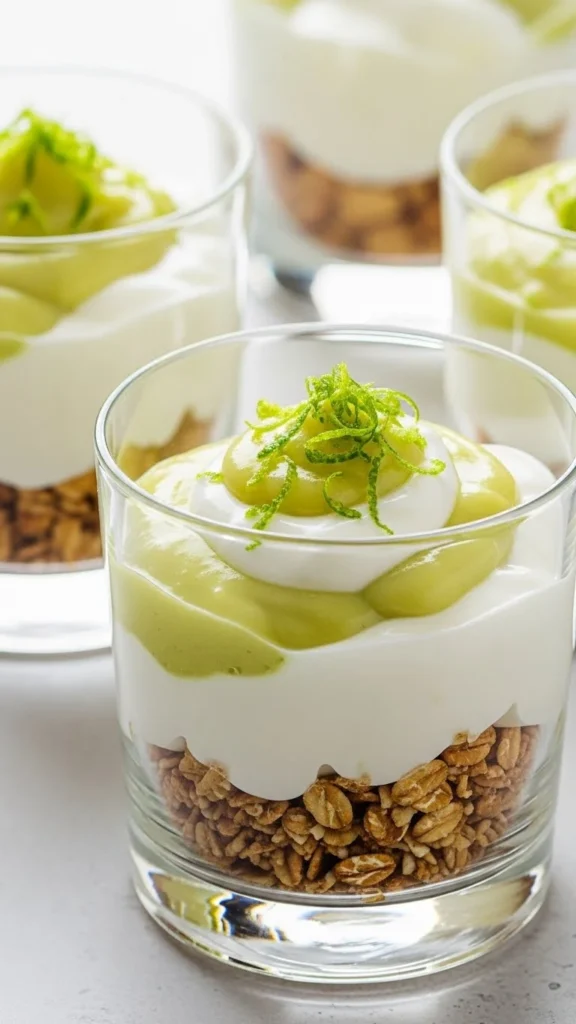
These cups look clean and modern with simple swirls and bright citrus color. Yogurt adds a smooth, light texture and lime curd brings glossy shine. Granola or crumb layers keep it interesting and give structure. They’re great for brunch spreads because they feel refreshing. You can prep the cups quickly and chill them until guests arrive.
Ingredients
- Greek yogurt: 2 cups (480 g)
- Lime curd: 3/4 cup (240 g)
- Honey: 2 tbsp (optional)
- Vanilla extract: 1 tsp
- Granola: 1 1/2 cups (150 g)
- Lime zest: 2 tsp
Instructions
- Stir yogurt with vanilla and honey (if using).
- Spoon granola into cups (2–3 tbsp each).
- Add yogurt, then lime curd. Swirl gently with a spoon.
- Chill 1–2 hours for best texture. No oven.
How to Serve It
- Top with lime zest right before serving for the freshest look.
- Add a few blueberries for color and pop.
- Serve cold to keep the swirl tidy.
- Use thick yogurt so the layers don’t blend.
- For extra crunch, sprinkle granola at the last second.
- Present on a white tray for a bright, clean photo.
10. Pistachio & Rose Cream Cups
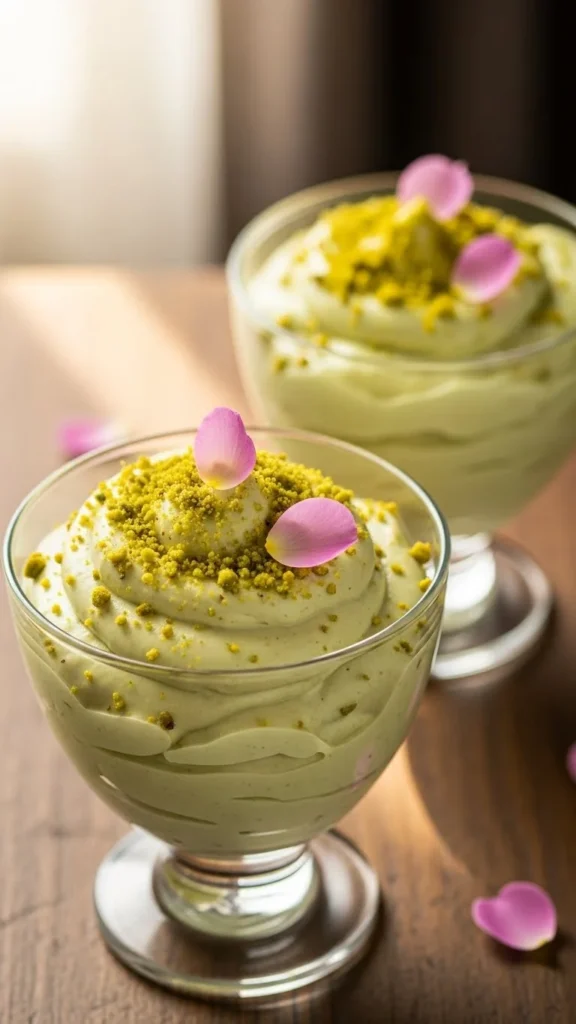
This one looks elegant because the green pistachio tone pairs beautifully with a light floral garnish. The cream is smooth and thick, so it holds a clean top. Rose water adds a subtle fragrance that feels special. Crushed pistachios add sparkle and texture. It’s a lovely option for parties where you want something pretty without fuss.
Ingredients
- Shortbread crumbs: 1 1/4 cups (150 g)
- Unsalted butter, melted: 5 tbsp (70 g)
- Mascarpone: 8 oz (225 g)
- Powdered sugar: 1/2 cup (60 g)
- Heavy cream, cold: 1 cup (240 ml)
- Pistachio paste: 1/4 cup (60 g)
- Rose water: 1/2 tsp
- Chopped pistachios: 1/4 cup
- Dried edible rose petals (optional): 1 tsp
Instructions
- Combine crumbs and butter; press into cups. Chill 10 minutes.
- Beat mascarpone, powdered sugar, pistachio paste, and rose water until smooth.
- Whip heavy cream to medium peaks; fold into pistachio mixture.
- Pipe into cups and chill 2–4 hours.
How to Serve It
- Sprinkle chopped pistachios for crunch and a tidy finish.
- Add a few rose petals for a delicate, upscale look.
- Serve cold so the cream stays thick and stable.
- A tiny pinch of salt balances the sweetness nicely.
- Use piping for smooth edges along the glass.
- Keep rose water subtle so it stays pleasant and light.
11. Matcha Chia Pudding Cups

Matcha chia cups look professional because the pudding sets evenly and creates a smooth, glossy surface. The green tone is natural and photogenic. Toppings like kiwi and coconut add bright contrast. These are also a great make-ahead option—just stir, chill, and portion. The texture is creamy with a gentle pop from the chia.
Ingredients
- Chia seeds: 1/2 cup (90 g)
- Unsweetened coconut milk (carton): 2 cups (480 ml)
- Maple syrup or honey: 3 tbsp (45 ml)
- Matcha powder: 1 tbsp
- Vanilla extract: 1 tsp
- Kiwi, sliced (topping): 2
- Coconut flakes (topping): 1/4 cup
Instructions
- Whisk matcha into coconut milk until smooth.
- Stir in chia seeds, syrup, and vanilla.
- Rest 10 minutes, then stir again to prevent clumps.
- Chill 4 hours or overnight.
- Spoon into cups and top before serving. No baking.
How to Serve It
- Top with kiwi slices for bright, fresh contrast.
- Sprinkle coconut flakes for texture.
- Serve very cold for a thicker spoonful.
- Stir the mixture twice before chilling for smooth results.
- Use clear cups so the green pudding shows well.
- Add lime zest for an extra fresh finish.
12. Green Velvet Cake Cup Trifles

These look like bakery trifles because the cake cubes create crisp, graphic layers. The green velvet crumb gives a fun festive color. Cream cheese frosting adds a bright, creamy line between layers. You can assemble them fast using baked cake or store-bought cake. They’re sturdy, travel well, and feel celebratory on a dessert table.
Ingredients
- Green velvet cake, baked and cooled: 4 cups cubed (about 500 g)
- Cream cheese, softened: 8 oz (225 g)
- Unsalted butter, softened: 4 tbsp (56 g)
- Powdered sugar: 1 1/2 cups (180 g)
- Vanilla extract: 1 tsp
- Milk: 1–2 tbsp (as needed)
- Sprinkles: 2 tbsp (optional)
Instructions
- Beat cream cheese and butter until smooth (1–2 minutes).
- Add powdered sugar and vanilla; beat until fluffy. Add a splash of milk if thick.
- Layer cake cubes and frosting in cups (2–3 layers).
- Chill 1–2 hours to set.
How to Serve It
- Add sprinkles right before serving for the brightest color.
- Top with a small frosting swirl for height.
- Serve chilled for clean layers.
- Use uniform cake cubes for a neat “striped” look.
- A few white chocolate chips look great on top.
- Keep cups covered in the fridge to prevent drying.
13. Kiwi Lime Cheesecake Cups
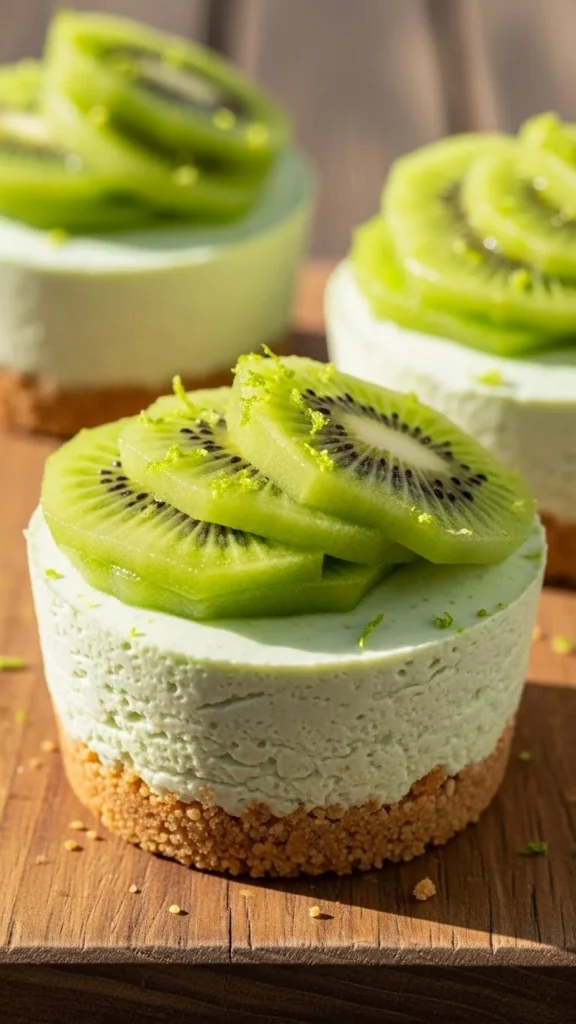
Kiwi on top instantly makes these look like a café dessert. The cheesecake layer is smooth and firm, so it photographs beautifully. Lime adds brightness so the flavor stays fresh. A simple crumb base keeps the cup structured and easy to serve. These are great for spring parties and fruit-forward dessert boards.
Ingredients
- Graham cracker crumbs: 1 1/2 cups (150 g)
- Unsalted butter, melted: 6 tbsp (85 g)
- Cream cheese, softened: 16 oz (450 g)
- Powdered sugar: 3/4 cup (90 g)
- Heavy cream, cold: 3/4 cup (180 ml)
- Lime juice: 2 tbsp (30 ml)
- Lime zest: 2 tsp
- Kiwi, sliced: 4
Instructions
- Mix crumbs and butter; press into cups. Chill 10 minutes.
- Beat cream cheese and powdered sugar until smooth. Add lime juice and zest.
- Whip heavy cream to soft peaks; fold into mixture.
- Pipe into cups; chill 3–4 hours.
- Top with kiwi right before serving.
How to Serve It
- Slice kiwi thin and fan it for a “professional” finish.
- Add lime zest for color and aroma.
- Serve cold so the topping stays fresh and the filling stays firm.
- Brush kiwi with a little honey-water for shine.
- Keep fruit off the cups until close to serving time.
- Add a crisp cookie on the side for a cute garnish.
14. Mint Oreo Crumble Cups
These cups look dramatic because the dark cookie crumble contrasts with the mint green layers. The texture mix is satisfying—creamy, crunchy, and soft all at once. They’re quick to assemble and easy to scale for crowds. The top can be finished with crumbs, curls, or a small cookie piece. They’re party-friendly and always disappear fast.
Ingredients
- Chocolate sandwich cookies, crushed: 2 1/2 cups (about 280 g)
- Unsalted butter, melted: 4 tbsp (56 g)
- Instant vanilla pudding mix: 1 (3.4 oz / 96 g) box
- Cold milk: 2 cups (480 ml)
- Whipped topping: 2 cups (about 240 g)
- Peppermint extract: 1/4 tsp
- Green food coloring: 1–2 drops (optional)
Instructions
- Mix half the cookie crumbs with melted butter for the base; press into cups.
- Whisk pudding mix with milk for 2 minutes; let set 5 minutes.
- Fold whipped topping into pudding; add peppermint and optional coloring.
- Layer cream and remaining cookie crumbs in cups.
- Chill 1–2 hours.
How to Serve It
- Sprinkle extra crumbs on top for a clean finish.
- Add a small cookie wedge for height.
- Serve cold so layers stay distinct.
- Pipe the top layer for a smooth edge.
- Use clear cups to show the contrast.
- Keep peppermint light so it tastes balanced.
15. Pistachio Brownie Trifle Cups
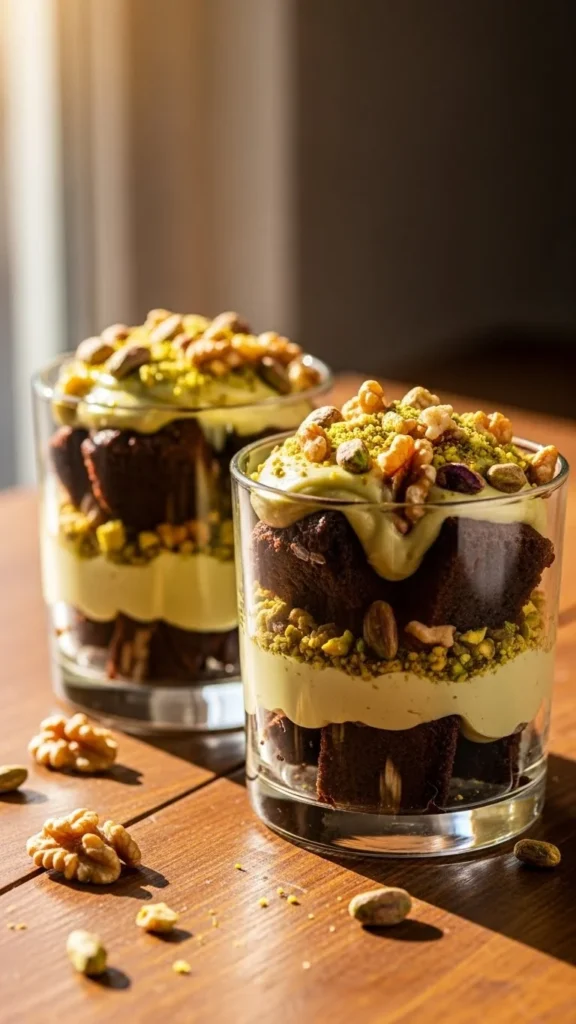
These feel like a dessert-shop trifle because the brownie chunks create texture and height. Pistachio cream adds a soft green layer that looks rich and smooth. The flavor combo is bold—chocolate plus nutty sweetness. They’re easy to prep with boxed brownies or leftover brownies. A final sprinkle of pistachios makes each cup look finished.
Ingredients
- Brownies, baked and cooled: 3 cups cubed (about 360 g)
- Cream cheese, softened: 8 oz (225 g)
- Powdered sugar: 1/2 cup (60 g)
- Pistachio paste: 1/4 cup (60 g)
- Heavy cream, cold: 1 cup (240 ml)
- Vanilla extract: 1 tsp
- Chopped pistachios: 1/4 cup
Instructions
- Beat cream cheese, powdered sugar, pistachio paste, and vanilla until smooth.
- Whip heavy cream to medium peaks; fold into pistachio mixture.
- Layer brownie cubes and pistachio cream in cups (2–3 layers).
- Chill 2 hours for best texture.
How to Serve It
- Top with chopped pistachios for crunch and a neat look.
- Add chocolate shavings for a dramatic finish.
- Serve chilled so the cream holds its shape.
- Use small brownie cubes for tidy layers.
- A tiny pinch of salt boosts chocolate flavor.
- Pair with coffee or milk for a classic combo.
16. Matcha Lemon Cream Cups
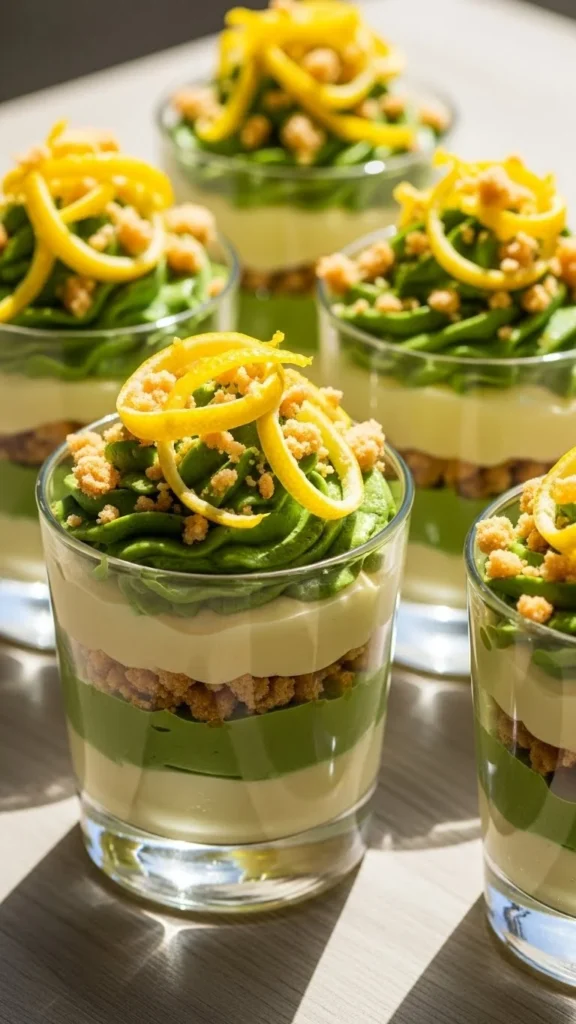
These cups look refined because the pale green cream and yellow zest create a clean color palette. Lemon keeps the flavor bright, while matcha adds gentle depth. Shortbread crumbs give a crisp base that stays crunchy when chilled. They’re light enough for brunch but still feel special. The top garnish is simple and very photo-friendly.
Ingredients
- Shortbread crumbs: 1 1/4 cups (150 g)
- Unsalted butter, melted: 5 tbsp (70 g)
- Mascarpone: 8 oz (225 g)
- Powdered sugar: 1/2 cup (60 g)
- Heavy cream, cold: 1 cup (240 ml)
- Matcha powder: 1 tbsp
- Lemon zest: 1 tbsp
- Lemon juice: 1 tbsp (15 ml)
Instructions
- Mix crumbs and butter; press into cups. Chill 10 minutes.
- Beat mascarpone and powdered sugar until smooth.
- Whisk matcha into lemon juice; add to mascarpone with zest.
- Whip cream to medium peaks; fold in.
- Fill cups and chill 2–3 hours.
How to Serve It
- Finish with lemon zest curls for a fresh look.
- Add a small shortbread piece on the rim.
- Serve cold for clean layers.
- Dust a tiny bit of matcha for a soft green top.
- Keep cups covered so the cream stays fresh.
- Add berries for a bright accent.
17. Green Apple Cheesecake Cups
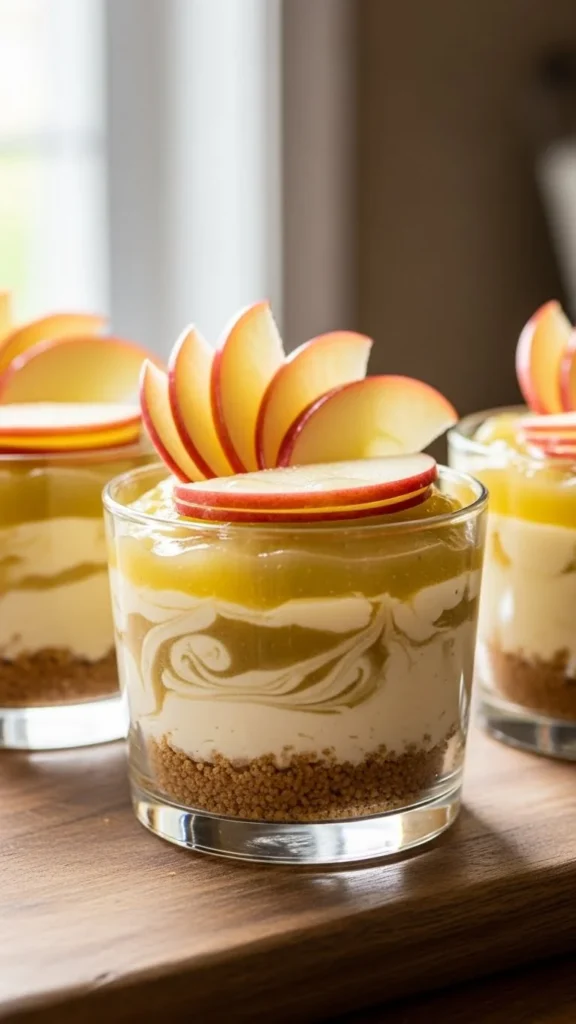
Green apple gives these cups a bright, fresh flavor that stands out from typical desserts. The swirl looks professional and adds movement on top. Cheesecake keeps the texture creamy and stable when chilled. Apple slices on top make them look like a bakery display. They’re great for parties because they taste familiar but feel a bit different.
Ingredients
- Graham cracker crumbs: 1 1/2 cups (150 g)
- Unsalted butter, melted: 6 tbsp (85 g)
- Cream cheese, softened: 16 oz (450 g)
- Powdered sugar: 3/4 cup (90 g)
- Heavy cream, cold: 3/4 cup (180 ml)
- Apple butter or thick applesauce: 1/2 cup (120 g)
- Green food coloring: 1 drop (optional)
- Thin green apple slices (topping): 1 apple
- Lemon juice (for apple slices): 1 tsp
Instructions
- Press crumb base into cups; chill 10 minutes.
- Beat cream cheese and powdered sugar until smooth.
- Whip heavy cream to soft peaks; fold into cheesecake.
- Stir apple butter into a portion of filling (add optional coloring).
- Spoon plain filling into cups, then swirl apple mixture on top. Chill 3–4 hours.
How to Serve It
- Toss apple slices with lemon juice so they stay bright.
- Add a tiny caramel drizzle for extra shine.
- Serve well chilled for firm texture.
- A sprinkle of cinnamon looks great and tastes cozy.
- Use a toothpick to refine the swirl pattern.
- Keep apple topping until close to serving time.
18. Pistachio & Berry Yogurt Cups
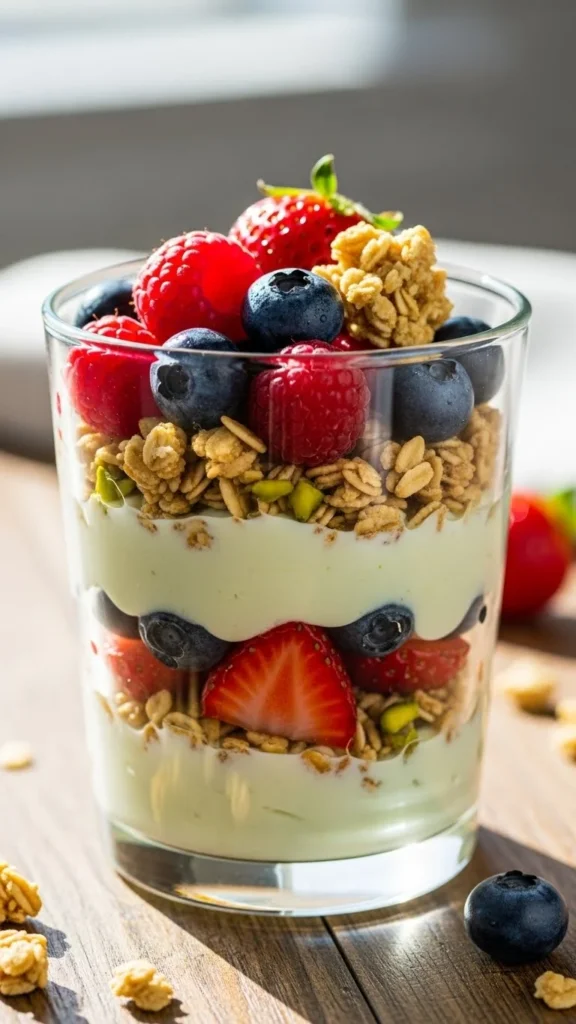
These cups look crisp and colorful because the berries create strong contrast against the soft green layer. Pistachio yogurt keeps things creamy and lightly sweet. Granola adds crunch and makes the layers easy to see. They’re perfect for brunch, showers, or lighter dessert tables. You can assemble them quickly and chill until serving.
Ingredients
- Plain Greek yogurt: 2 cups (480 g)
- Pistachio paste: 3 tbsp (45 g)
- Honey: 3 tbsp (45 ml)
- Vanilla extract: 1 tsp
- Granola: 1 1/2 cups (150 g)
- Mixed berries: 2 cups (300 g)
Instructions
- Stir yogurt with pistachio paste, honey, and vanilla until smooth.
- Add granola to cups, then pistachio yogurt, then berries.
- Repeat one more layer if cups are tall.
- Chill 30–60 minutes.
How to Serve It
- Top with extra berries for a bright finish.
- Add chopped pistachios for texture and shine.
- Serve cold so yogurt stays thick.
- Keep granola on top until serving if you want max crunch.
- Use clear cups for the prettiest layered look.
- Add mint tips for a clean garnish.
19. Mint Lime Jello Cream Cups
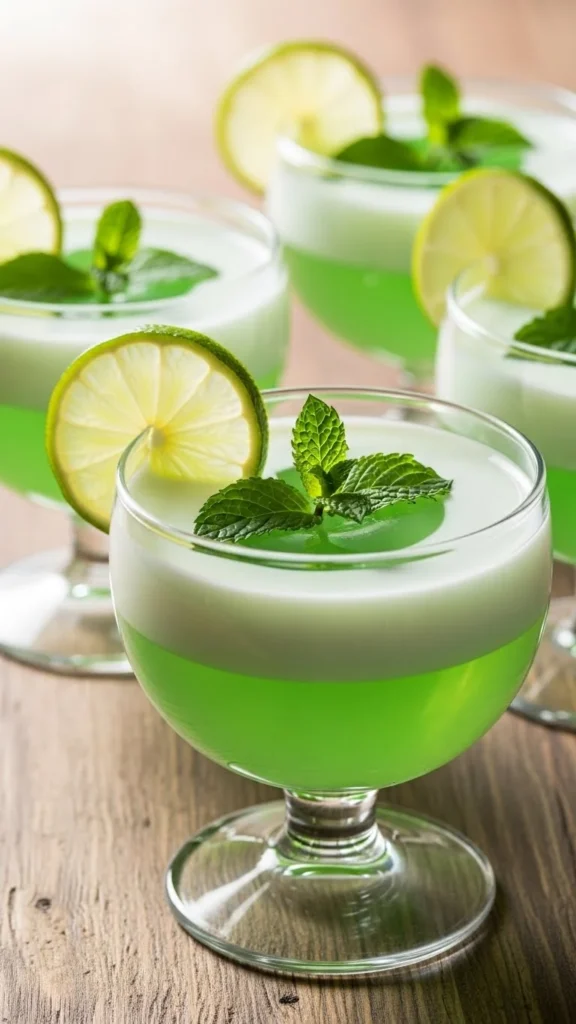
These cups look playful and polished because the gelatin sets with a glossy, smooth surface. A creamy top layer adds contrast and a clean finish. Lime flavor reads fresh and festive, especially for spring. They’re budget-friendly and easy to portion. With a few simple garnishes, they look party-ready fast.
Ingredients
- Lime gelatin mix: 2 (3 oz / 85 g) boxes
- Boiling water: 2 cups (480 ml)
- Cold water: 2 cups (480 ml)
- Sour cream: 1 cup (240 g)
- Whipped topping: 1 1/2 cups (about 180 g)
- Lime zest: 1 tsp
- Mint leaves (garnish): optional
Instructions
- Dissolve gelatin in boiling water (2 minutes). Stir in cold water.
- Pour halfway into cups; chill 45–60 minutes until softly set.
- Whisk sour cream with lime zest, then fold in whipped topping.
- Spoon cream layer on top. Chill 2 hours until firm.
How to Serve It
- Garnish with a mint leaf and a thin lime slice.
- Serve very cold for best texture.
- Keep the creamy top smooth by spooning gently.
- Add a little zest right before serving for a fresh look.
- Use straight-sided glasses for clean layer lines.
- Arrange on a tray with lime wedges for extra color.
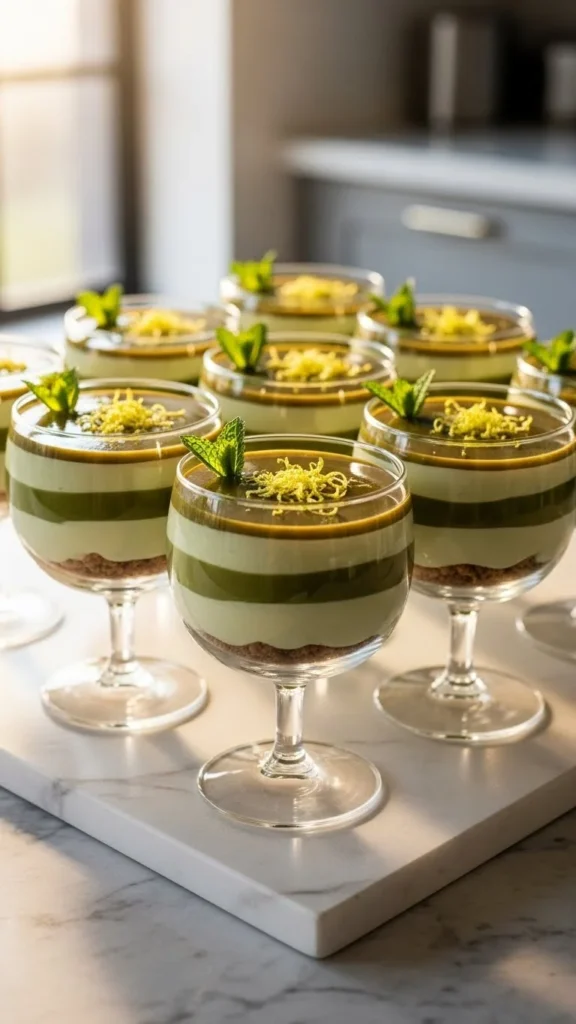
20. Matcha Panna Cotta Cups
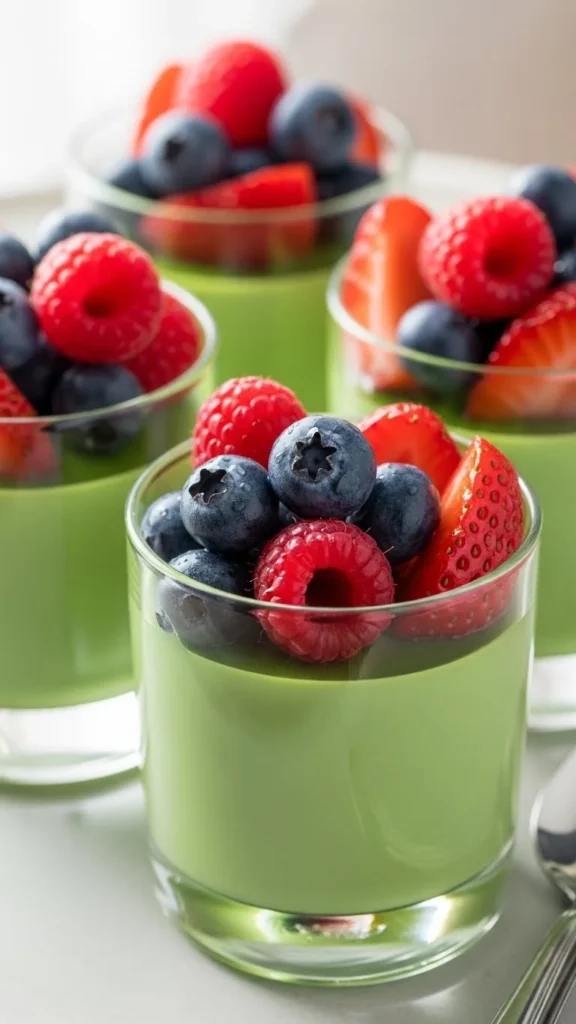
Matcha panna cotta looks restaurant-level because it sets into a perfectly smooth, glossy cream. The green color is subtle and elegant. A spoonful of berry topping adds contrast and makes the cup look finished. The texture is silky and rich without feeling heavy. It’s a showy make-ahead dessert that photographs beautifully.
Ingredients
- Heavy cream: 2 cups (480 ml)
- Whole milk: 1 cup (240 ml)
- Granulated sugar: 1/2 cup (100 g)
- Matcha powder: 1 tbsp
- Vanilla extract: 1 tsp
- Gelatin powder: 2 1/4 tsp (1 packet / 7 g)
- Cold water (for blooming): 3 tbsp (45 ml)
- Berry sauce or jam (topping): 1/2 cup
Instructions
- Bloom gelatin in cold water for 5 minutes.
- Heat cream, milk, and sugar until steaming (do not boil).
- Whisk matcha with a few spoons of warm liquid until smooth, then whisk back in.
- Remove from heat; stir in gelatin until dissolved. Add vanilla.
- Pour into cups. Chill 4–6 hours until set.
How to Serve It
- Top with berry sauce for color and shine.
- Serve cold so the panna cotta holds cleanly on the spoon.
- Add a tiny matcha dusting for a finished look.
- Use a warm spoon for the smoothest scoops.
- A few fresh berries make it look bakery-ready.
- Keep covered in the fridge to protect the surface.
21. Pistachio Cookie Butter Cups
These cups look professional thanks to the glossy cookie butter swirl and the pale pistachio cream base. The swirl adds movement and makes each cup unique. Cookie crumbs give structure and a satisfying crunch. The flavor is cozy and sweet with a nutty finish. They’re easy to prep ahead and serve straight from the fridge.
Ingredients
- Speculoos cookie crumbs: 1 1/2 cups (150 g)
- Unsalted butter, melted: 6 tbsp (85 g)
- Cream cheese, softened: 8 oz (225 g)
- Powdered sugar: 1/2 cup (60 g)
- Heavy cream, cold: 1 cup (240 ml)
- Pistachio paste: 1/4 cup (60 g)
- Cookie butter: 1/3 cup (90 g)
- Chopped pistachios: 1/4 cup
Instructions
- Press cookie crumbs + butter into cups; chill 10 minutes.
- Beat cream cheese, powdered sugar, and pistachio paste until smooth.
- Whip heavy cream to medium peaks; fold into pistachio mixture.
- Fill cups, then spoon cookie butter on top and swirl gently.
- Chill 2–4 hours.
How to Serve It
- Sprinkle chopped pistachios for crunch and a finished look.
- Serve cold so the swirl stays sharp.
- Add a small cookie on the rim for a cute garnish.
- A pinch of flaky salt balances the sweetness nicely.
- Use a toothpick to refine the swirl pattern.
- Keep covered in the fridge so the top stays glossy.
Conclusion
If you want desserts that look like they came from a bakery case, these green dessert cups are an easy win—clean layers, pretty toppings, and make-ahead friendly. Save your favorites, mix a few styles for a dessert bar, and share them at your next party for a festive spread that photographs beautifully.