Dessert jars are one of those ideas that instantly make life easier and more stylish. They look cute, feel intentional, and solve a bunch of hosting problems all at once—no slicing, no messy plating, no awkward “who wants the last piece?” moments. Whether you’re planning a party, prepping make-ahead treats, or just want portion-controlled desserts ready in the fridge, dessert jars are the move.
And the best part? You don’t need fancy tools or complicated recipes to make them work.
Let’s walk through how to build dessert jars that are easy to serve, easy to store, and guaranteed to impress.
Why Dessert Jars Are So Popular (for Good Reason)
Dessert jars aren’t just trendy—they’re practical.
They’re perfect because:
- Everyone gets the same portion
- No cutting or serving utensils needed
- Easy to transport
- Great for make-ahead planning
- Visually appealing with minimal effort
They work just as well for casual weeknights as they do for celebrations, potlucks, and holidays.
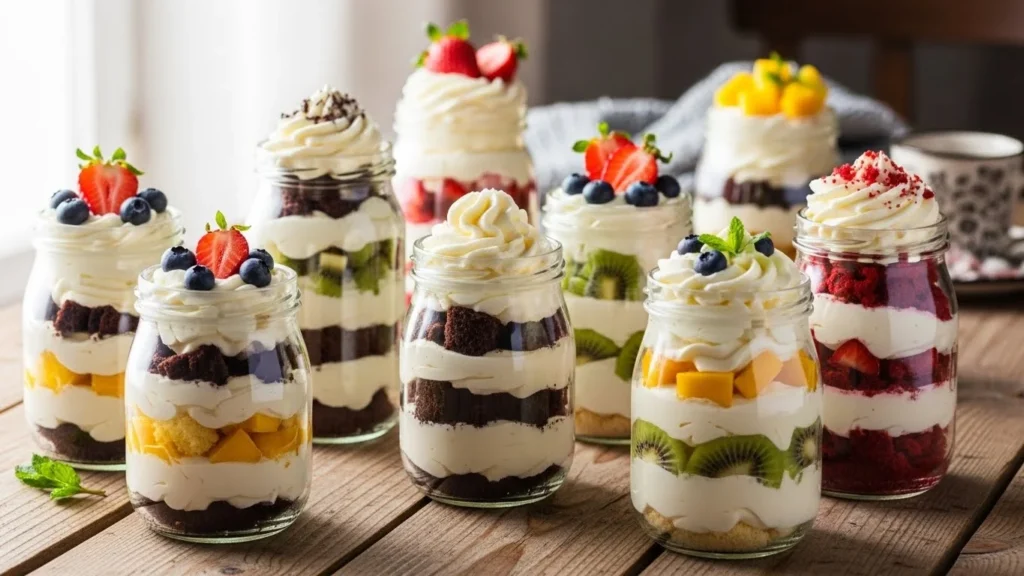
Choose the Right Jars for the Job
The container matters more than you think.
Best jar options:
- Small mason jars (4–8 oz)
- Glass yogurt jars
- Mini weck jars
- Clear plastic cups for large events
What to look for:
- Clear sides (layers matter!)
- Wide openings for easy eating
- Lids if you’re storing or transporting
For most desserts, 6–8 oz jars are the sweet spot—enough to feel indulgent without being overwhelming.
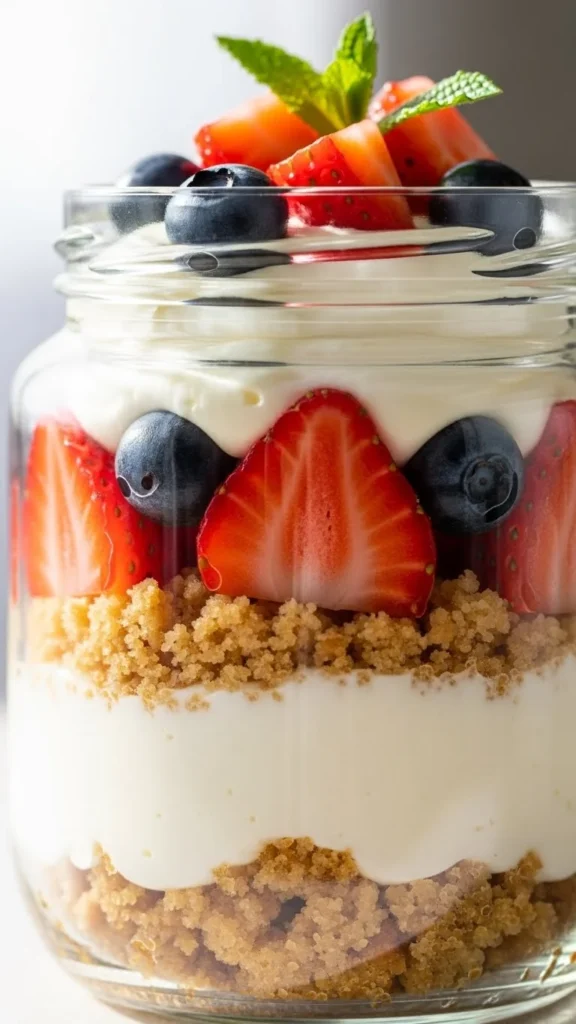
Build Desserts in Smart, Scoopable Layers
The secret to great dessert jars is structure. Each layer should support the next without collapsing or bleeding.
A simple layering formula:
- Base (cake, cookie crumbs, or crust)
- Creamy layer (custard, whipped cream, yogurt)
- Flavor layer (fruit, sauce, or spread)
- Repeat if space allows
- Light topping

Layering tips:
- Press crumb layers lightly, not firmly
- Use piping bags or zip bags for clean cream layers
- Keep wet ingredients away from the bottom when possible
Clean layers = prettier jars and better texture.
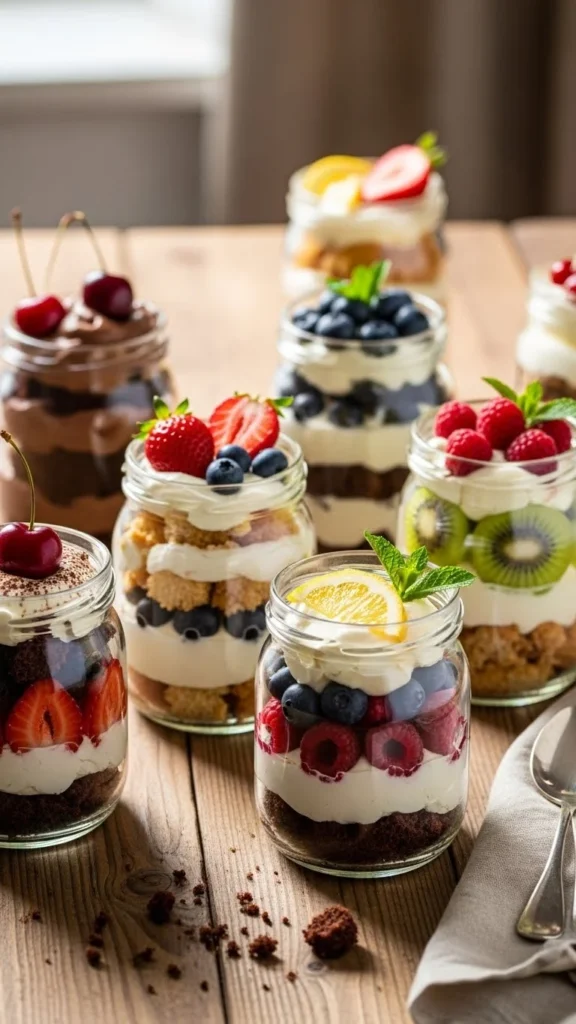
Pick Desserts That Actually Work in Jars
Not every dessert is jar-friendly. You want recipes that benefit from being layered and served cold or at room temperature.
Great dessert jar ideas:
- Cheesecake jars
- Tiramisu-style jars
- Chocolate mousse
- Pudding and custards
- Shortcake with fruit
- No-bake desserts
Avoid:
- Desserts that need crisp crusts
- Anything that melts quickly
- Overly dry cakes without moisture
Jar desserts should be soft, spoonable, and forgiving.
Balance Textures for the Best Bite
Texture is what keeps dessert jars from feeling boring after the first spoonful.
Aim for:
- Soft + creamy
- Crunchy + smooth
- Light + rich
Examples:
- Cookie crumbs + whipped cream
- Sponge cake + fruit compote
- Granola + yogurt-style cream
A little contrast goes a long way.
Keep Flavors Clean and Not Overloaded
Because jars are smaller, flavors should feel focused—not cluttered.
Helpful rules:
- Stick to 2–3 main flavors
- Don’t overload with sauces
- Use sweetness intentionally
For example:
- Chocolate + vanilla + berry
- Lemon + cream + shortbread
- Coffee + cocoa + mascarpone
Simple combinations taste more polished and less overwhelming.
Make Dessert Jars Ahead (Without Ruining Them)
One of the biggest perks of dessert jars is how well they store—if you plan properly.
Make-ahead tips:
- Add crunchy toppings just before serving
- Store fruit layers thickened or cooked
- Cover jars tightly to avoid fridge odors
- Chill at least 2–4 hours for best texture
Most dessert jars last:
- 2–3 days refrigerated (cream-based)
- 4–5 days if dairy-free or baked layers only
Garnish Right Before Serving
A small finishing touch makes jars feel bakery-level.
Easy garnishes:
- Fresh berries
- Chocolate shavings
- Crushed cookies
- A swirl of cream
- Dusting of cocoa or powdered sugar
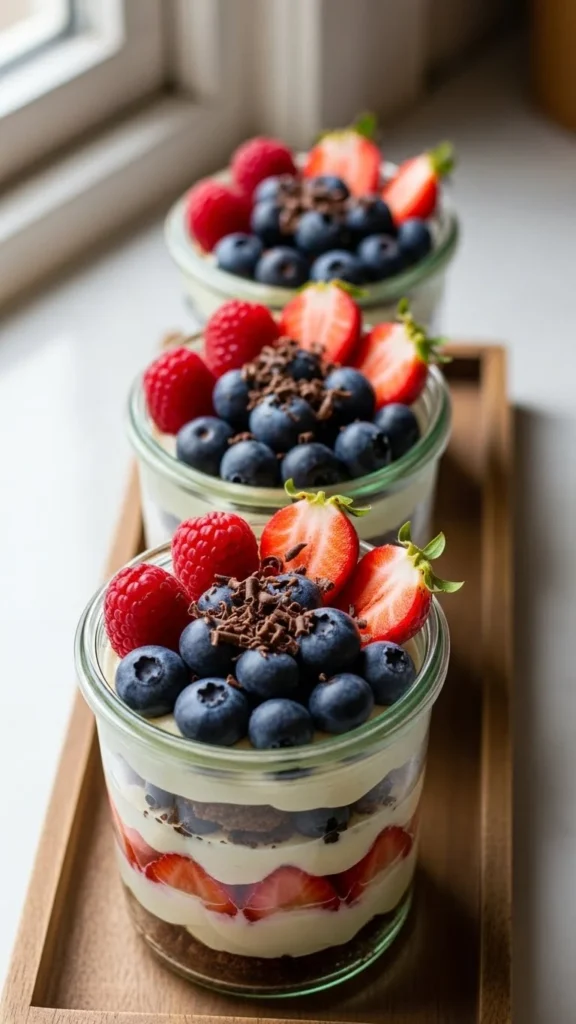
Garnish just before serving to keep everything fresh and photogenic.
Dessert Jars for Parties and Events
If you’re serving a crowd:
- Prep jars the day before
- Keep them chilled until serving
- Offer 2–3 flavor options
- Label flavors if needed
Guests love grabbing a jar and going—no plates, no mess, no stress.
Final Takeaway
Dessert jars are the ultimate low-effort, high-impact dessert solution. With the right jar, smart layers, and balanced flavors, you can create beautiful desserts that serve themselves.