Some desserts feel like magic—especially when they come together without ever turning on the oven. Icebox cake is exactly that kind of treat. With a few simple ingredients, a little layering, and some chill time, you get a cake-like dessert that’s creamy, soft, and surprisingly impressive.
If you’ve never made an icebox cake before, don’t worry. It’s one of the easiest desserts you’ll ever assemble, and it’s perfect for summer, holidays, or anytime you want something sweet with minimal effort.
What Is an Icebox Cake?
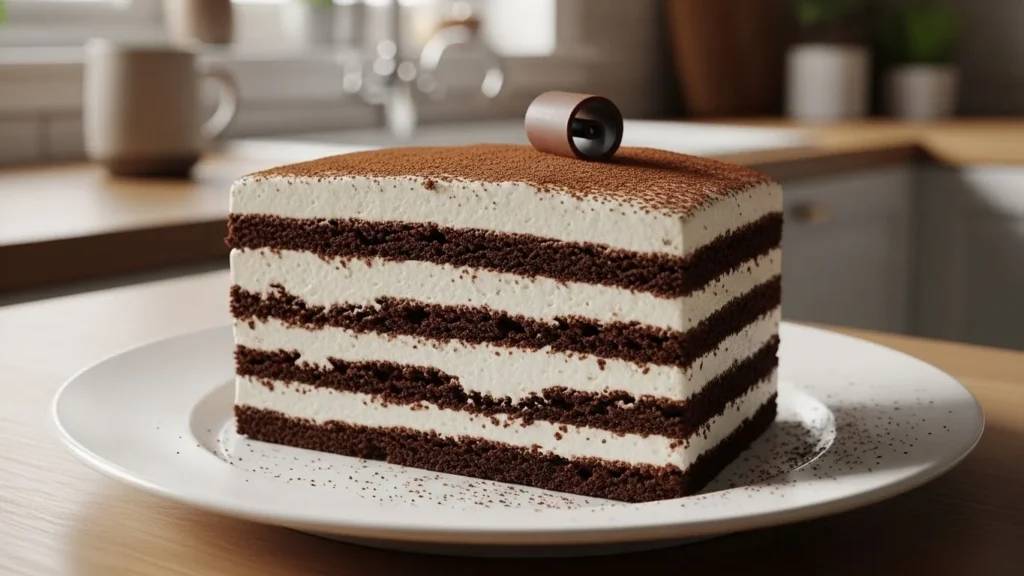
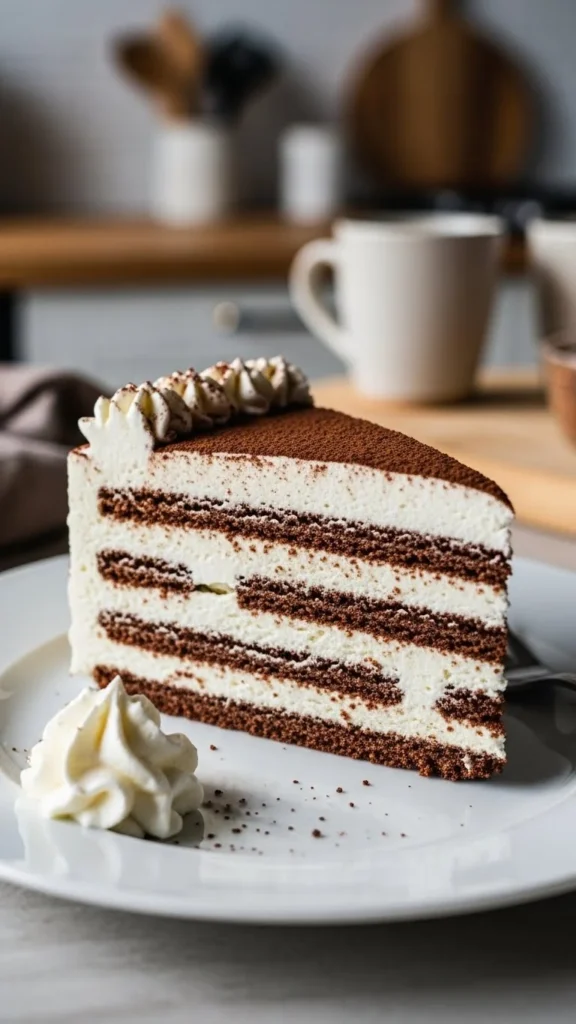
An icebox cake is a no-bake layered dessert traditionally made with cookies (or crackers) and whipped cream. As the cake chills in the fridge—also known as the “icebox”—the cookies soften, creating a sliceable, cake-like texture.
There’s no baking, no fancy equipment, and no complicated steps. Time does all the work.
Classic components include:
- Crisp cookies or wafers
- Whipped cream or creamy filling
- Flavor boosters like chocolate, fruit, or caramel
The longer it chills, the better it gets.
Choose the Right Cookies or Crackers
The cookie layer is what gives icebox cake its structure, so choosing the right one matters.
Best options:
- Chocolate wafer cookies
- Graham crackers
- Vanilla wafers
- Shortbread cookies
- Digestive biscuits
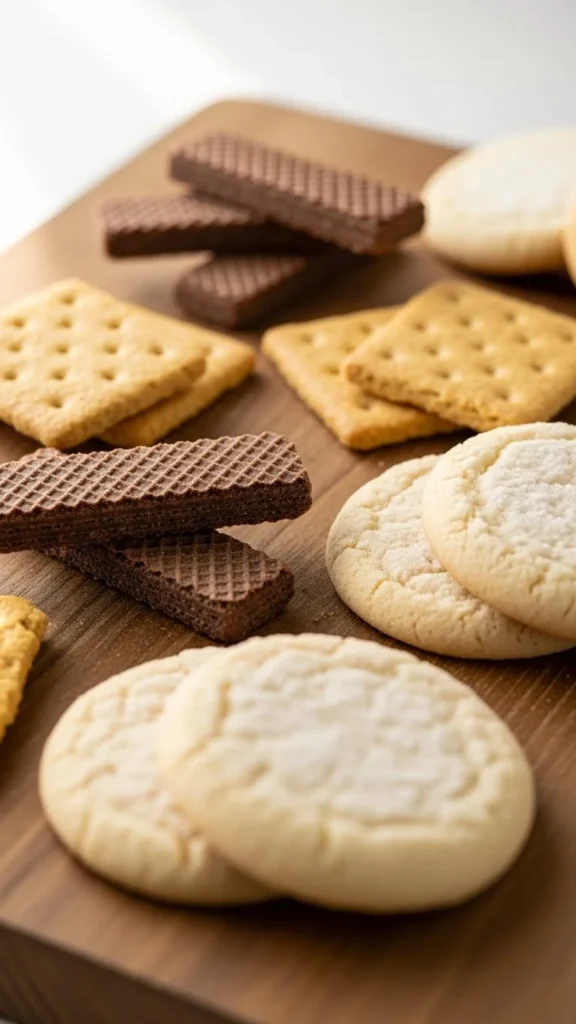
Avoid overly soft cookies. You want something crisp that will absorb moisture and soften gradually in the fridge.
Tip: Thinner cookies soften faster; thicker ones create bolder layers.
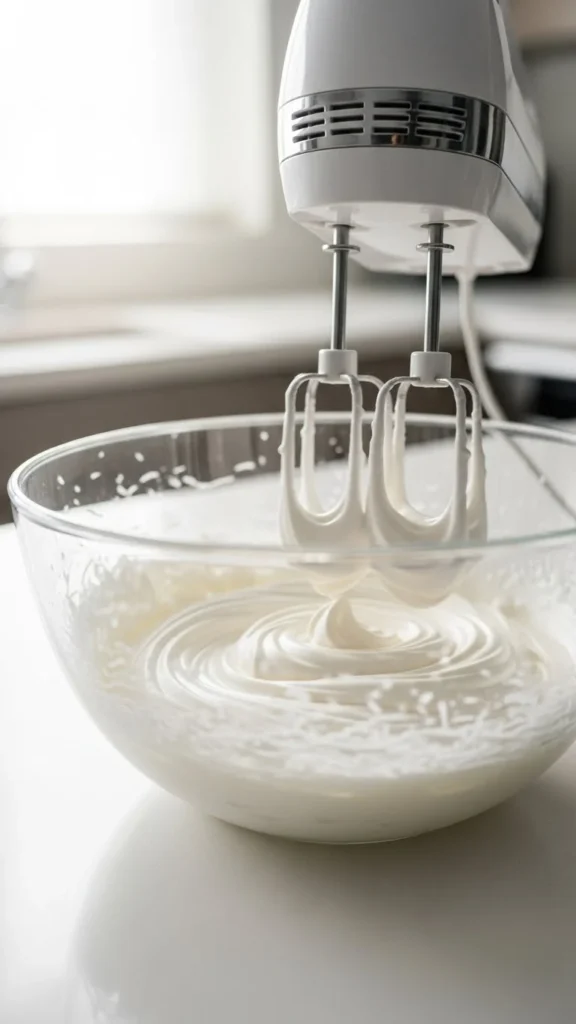
Make a Creamy, Stable Filling
Whipped cream is the heart of an icebox cake. It should be fluffy, lightly sweetened, and sturdy enough to hold layers.
Basic whipped cream formula:
- Cold heavy cream
- Powdered sugar
- Vanilla extract
Whip until soft peaks form—firm but still smooth. Overwhipping makes it grainy.
Want more flavor or structure?
- Add cream cheese for tang
- Fold in mascarpone for richness
- Mix in melted chocolate or cocoa powder
Keep the filling cold so it spreads easily and holds its shape.
Layer Everything Like a Pro
Layering is where the magic happens, and it’s surprisingly forgiving.
How to layer an icebox cake:
- Spread a thin layer of cream on the bottom of your dish
- Add a single layer of cookies
- Spread more cream evenly over the top
- Repeat until you reach the top
- Finish with a generous layer of cream
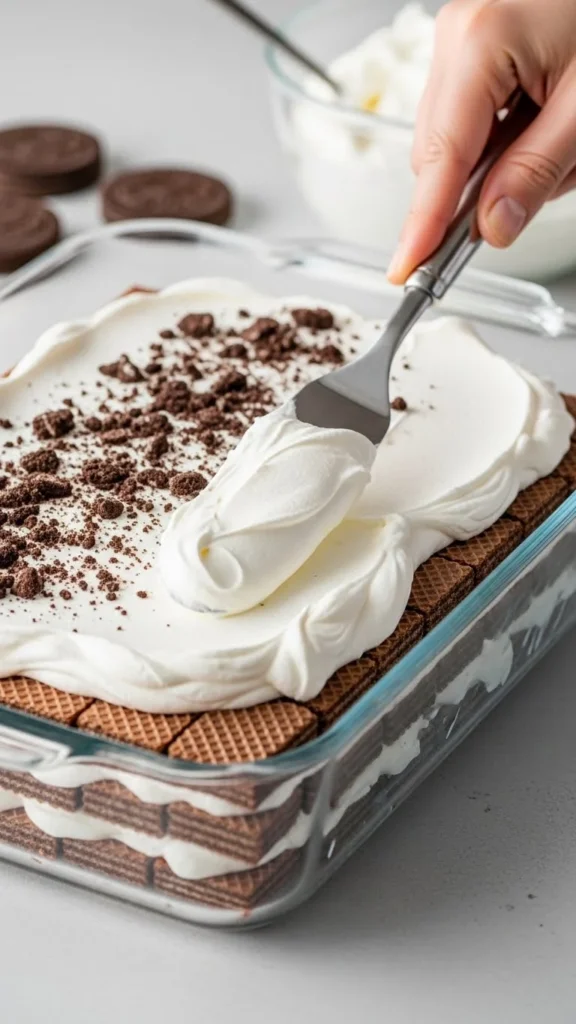
Don’t worry about perfection. As the cake chills, everything settles into clean, beautiful layers.
Chill Time Is Non-Negotiable
This is the most important step. Icebox cake needs time to transform.
Minimum chill time:
- 4 hours (overnight is even better)
During chilling:
- Cookies absorb moisture from the cream
- Layers soften evenly
- Flavors blend together
If you slice too early, the cake will fall apart. Patience pays off here.
Add Toppings Just Before Serving
Toppings bring texture and visual appeal—but timing matters.
Great topping ideas:
- Chocolate shavings or curls
- Cocoa powder or powdered sugar
- Crushed cookies
- Fresh berries
- Drizzled caramel or chocolate sauce
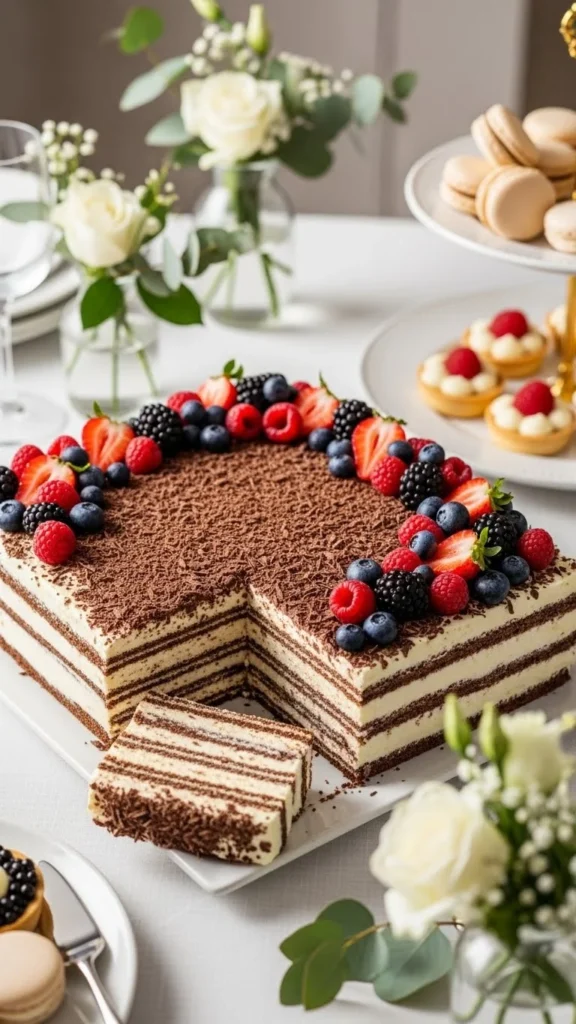
Add toppings right before serving so they stay crisp and fresh.
Flavor Variations to Try
Once you master the basics, icebox cake becomes endlessly customizable.
Easy flavor ideas:
- Chocolate + espresso whipped cream
- Vanilla wafers + banana slices
- Graham crackers + peanut butter cream
- Lemon cookies + citrus whipped cream
- Chocolate cookies + mint cream
You can even make individual icebox cakes in jars for parties or picnics.
Storage Tips for Best Results
Icebox cake stores beautifully, making it ideal for make-ahead desserts.
Storage tips:
- Cover tightly with plastic wrap
- Store in the fridge for up to 3 days
- Avoid freezing (texture can suffer)
- Slice with a sharp knife, wiping between cuts
The cake often tastes better on day two than day one.
Final Takeaway: The Easiest Cake You’ll Ever Love
Icebox cake proves that great desserts don’t need ovens, mixers, or stress. With simple ingredients and a little chill time, you get a dessert that’s creamy, soft, and crowd-pleasing every single time.
Whether you keep it classic or get creative, this no-bake favorite is always a win.
❄️ Save this recipe for later and enjoy cake—no baking required!